The Hunt for the Prometheus release date is almost upon us, which means that you will soon have your hands on those beautiful miniatures and so you will naturally want to rush home and start painting then as soon as possible. The team at Wayland Games are no different and Stuart B, the manager of the gaming centre, has been enjoying painting the Commonwealth ships. He’s had so much fun that he has kindly put together a step by step guide for you to give you some pointers on getting the best out of these fine vessels.


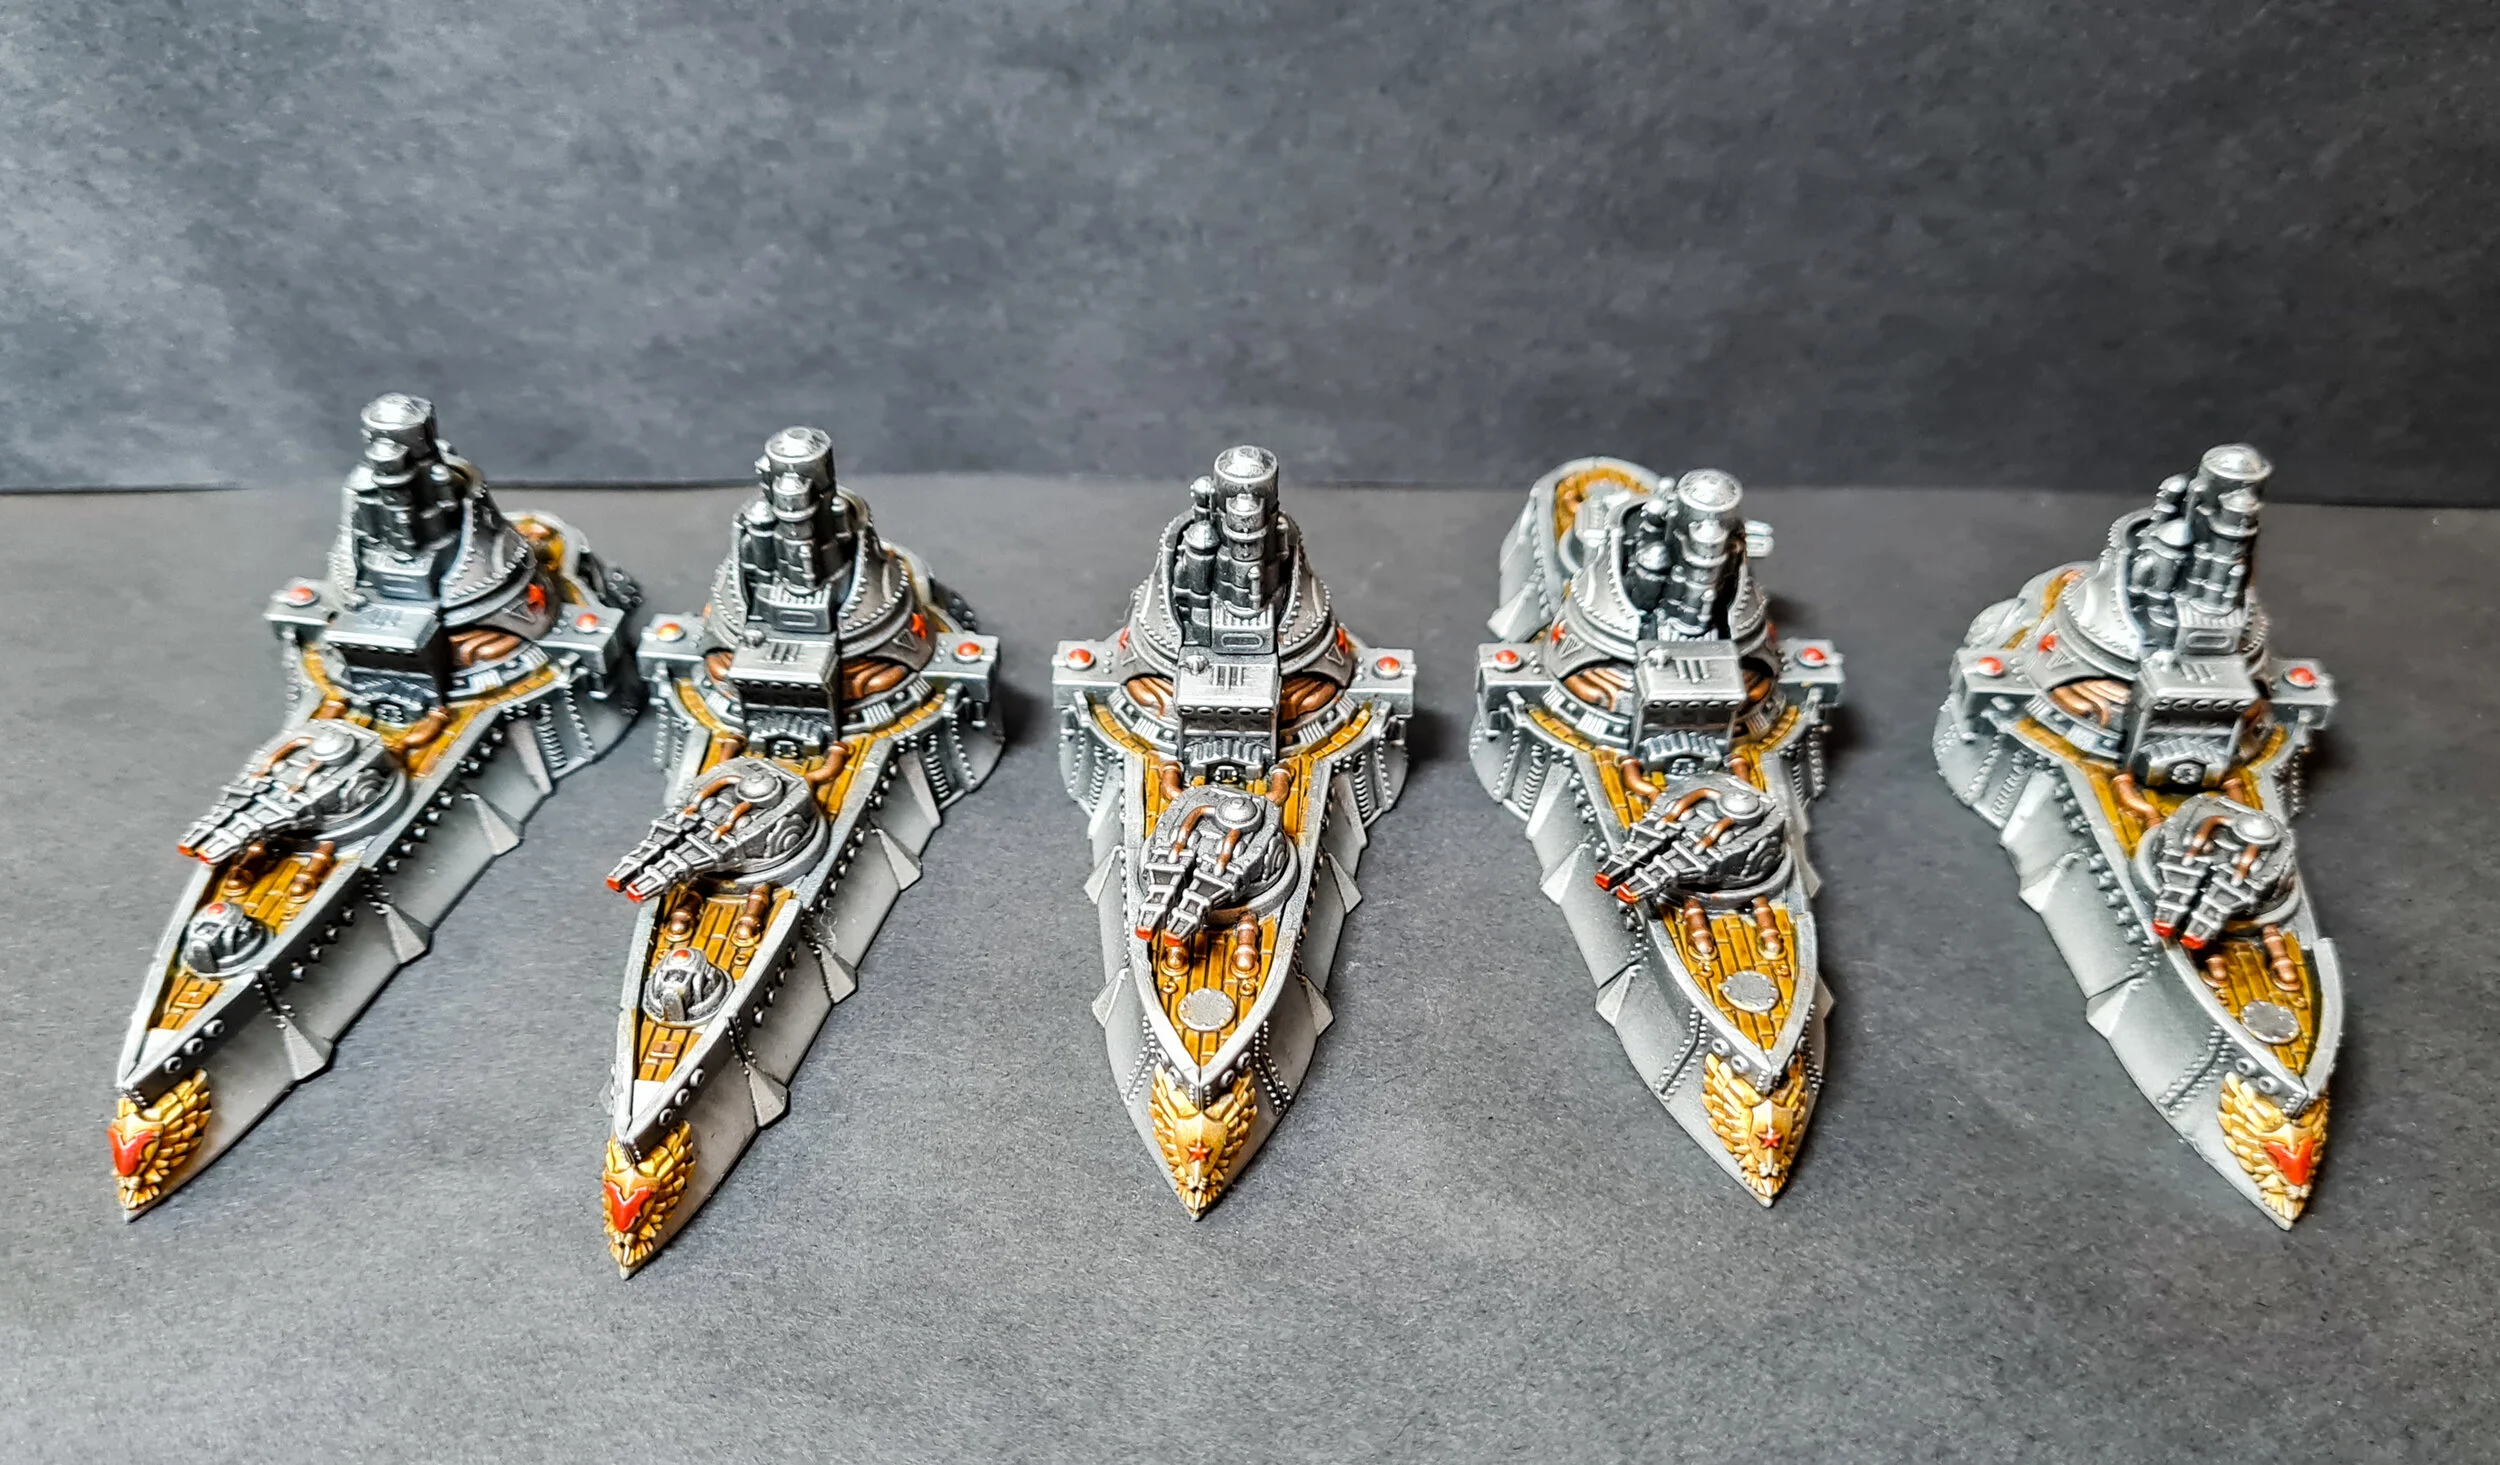
Hello, Stuart B here. Yes just to make things confusing there are two handsome chaps called Stuart at Wayland Games (and both are spelt correctly too!) In this blog, I will show you how I painted the Dystopian Wars Commonwealth Fleet for the Wayland Games Centre. These were great fun to paint, shouldn’t take you too long to get them onto the table and pointing their turrets at the pesky Covenant of the Enlightened!
I used an airbrush for some parts, but I will try and suggest ways to get a similar effect. I will also suggest the Games Workshop alternative to any non GW paints I used.
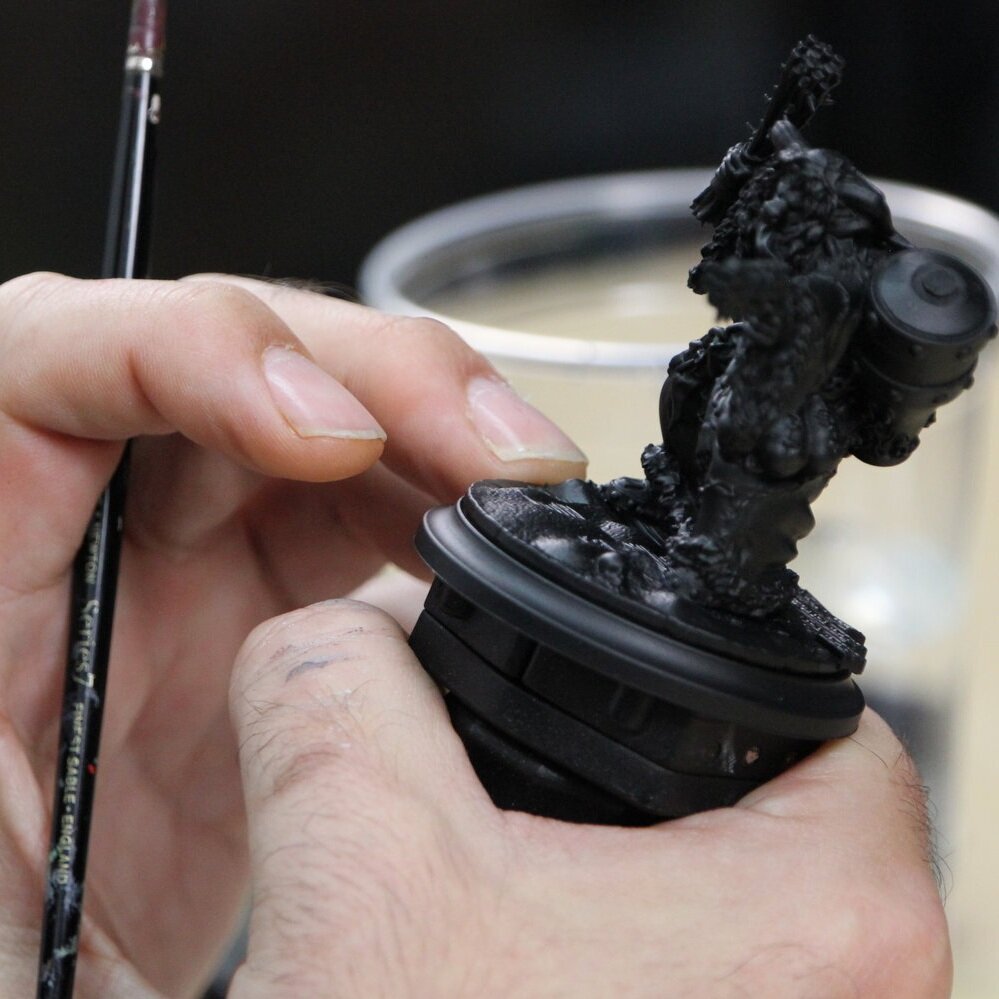
1) First of all I primed the models black. As I will be using predominantly metallic paints I decided to use a black primer. Any black primer will do the job.
2) I used an airbrush and sprayed Black Metal from Vallejo Model Air and covered the whole of the models. This gives us a nice dark metallic base. You could get a similar effect using Iron Warriors from Games Workshop.
3) I then sprayed Chainmail Silver from Vallejo Game Air over the models leaving a small amount of black metal where the shadows would be. You could also use Ironbreaker from GW. If you don’t have an airbrush, then you could drybrush this on, concentrating at the bottom of the bottom of the cruiser.
4) I then sprayed Silver from Vallejo Model Air at the points where the light would hit the cruisers. This gives a nice bright and smooth metallic finish. You can use Runefang Steel. Again if you don’t have an airbrush drybrush towards the very bottom of the cruisers.


5) Now it’s time to shade the metal. At the moment it looks a bit bright and flat so it needs a wash to shade the details and give the model more definition. As I didn’t want to lose any of the smooth transitions from the airbrush I used an oil wash. First I gave the cruisers a gloss varnish, I used liquitex gloss varnish, but Ardcoat from Games Workshop will work fine. I then mixed a small amount of black oil paint with some white spirits. I made a wash consistency, and then applied it to the cruiser. Because of the gloss varnish, the oil wash will run into the recesses of the model due to the low surface tension. Science is great! Don’t worry if it’s a bit messy, we will clean this up in the next step. If you would prefer to use traditional washes, you can carefully use Nuln Oil and pick out the recesses with it.
6) After an hour of drying time, I used a cotton bud with pure white spirit to clean up any areas I wanted to clean up the oil wash. By doing this we have shaded the model without undoing any of the smooth metal transitions. I then gave the cruiser a matte varnish to seal it.
7) I picked out the crest on the front of the cruiser in Retributor Gold from Games Workshop. I also picked out any areas I wanted to have a candy red effect in gold. Make sure you change your water after you have finished as this paint has a lot of gold metallic pigments that will stay in your water cup.


8) I then used a makeup brush to drybrush Chrome from Vallejo Model Air all over the cruiser, including the gold areas. A makeup brush has really soft bristles and gives a really smooth drybrush finish. You can also use Stormhost Silver by Games Workshop.
9) I then used Seraphim Sepia to wash the gold crest, and blood angels red contrast paint to pick out the red areas. The contrast paints over metallics give a great candy finish.
10) We are on the home stretch now! I painted the deck with Zandri Dust from Games Workshop. Use 2 thin coats for a smooth finish. Keeping the paint thin will also make sure it runs into the recesses. Don’t worry if you paint over the pipes, we will paint these last.


11) I then Snakebite Leather over the deck. This gives a quick easy wood effect. And the warm colour gives a nice contrast to the cold silvers. If you go over any of the silvers, just tidy it up with a thin coat of Chainmail / Ironbreaker.
12) Paint all the pipes with Balthasar Gold from Game Workshop
13) Give the pipes a wash of Agrax Earthshade and we are done! I painted Lahmian Medium from Games Workshop over the whole cruiser to finish off. This will mean the cruiser has a consistent finish on all the areas as some paints will be a bit glossier than others.
And there you have it, some nice tabletop standard cruisers. I used this technique on the Rurik Frigates and Borodino Battleship too. And now they are ready to show the Enlightened that all their fancy technology is no match for lots of big guns!
Stuart B